

Thursday, November 22, 2012
Happy Thanksgiving!
Tuesday, November 20, 2012
Bees Please!

This manicure is actually from this past summer, but I never posted it. It's pretty different from any design that I would normally do. This is more like a painting, whereas I usually do simple designs that aren't as cohesive. I used China Glaze Sea Spray and Lemon Fizz, OPI Black Onyx, Pirouette My Whistle, and Alpine Snow, and Essie Pretty Edgy. For more info and pictures click "Read more".
Friday, November 16, 2012
China Glaze Aquadelic Dot Mani

For this mani I used China Glaze Aquadelic, OPI Black Onyx, and Zoya Charla. For more pictures and info on how I did this click "Read More".
Tuesday, November 6, 2012
Deborah Lippmann Just Dance and Hit Me With Your Best Shot

Two posts in two days=progress, now I just have to keep it up. For this mani I used Deborah Lippmann Just Dance and Hit Me With Your Best Shot. For more info click "Read More"
Sunday, November 4, 2012
My 2nd Attempt At A Tape Mani

Sorry we haven't posted in like forever. We've been really busy and haven't been able to paint our nails/ blog about them very often. From now on we're going to try to post at least twice a week. This is my second try at using striping tape. It came out pretty sloppy. I used China Glaze Cheers To You, OPI Save Me, OPI Black Onyx, and CG Fairy Dust. For More Pictures and more info on how I did this click "Read More"
Monday, June 11, 2012
Fimo Fruit Gradient Nails

For this mani I used OPI Maude About You and China Glaze Fairy Dust and Refresh-mint. For more info and Pictures click "Read more".
Sunday, June 10, 2012
Tiffany & Co Inspired Manicure

This manicure was inspired by Tiffany&Co. I love Tiffany blue and China Glaze For Audrey is pretty close to spot on. I used For Audrey on all my nails excluding my ring finger. I put a little black half moon on my thumb using OPI Black Onyx, which I also used on my ring finger. I put a half pearl border around the half moon. I used a coat of OPI I Juggle... Men on all my fingers to add a little bit of sparkle. On my ring finger I put a rhinestone and a half pearl next to each other and surrounded it with little gold metal balls. It was my first time using the balls and it was a little difficult, so those are a little sloppy. I really liked this mani, but the pearls were a bit bulkier than I would've liked. Tell me what you think and remember to follow Mai Maddie Pedi!
Saturday, June 9, 2012
Shifty Silver Mani

This mani was actually on my right hand when I did my V mani, because I'm right handed and don't usually have the patience to do complicated nail art when I know it won't come out as cleanly as my left hand. I used OPI Black Onyx and Pearl of Wisdom and Deborah Lippmann Today Was A Fairytale. For more pictures and a detailed explanation click the "Read More" button.
Friday, June 8, 2012
Golden Prom Nails

This mani was originally created to show my friend the gold polishes that I could paint her nails for prom. I ended up really liking it, but my friend decided she wanted something different that was more complicated. The colors I used in this were Deborah Lippmann Believe and Boom Boom Pow and OPI Spark de Triomphe. Click 'Read More' for more pictures and a more detailed explanation if this mani.
Wednesday, June 6, 2012
Black & Purple V Design

For more pictures, instructions, and the colors I used in this mani click read more.
Reptile Style

Tuesday, June 5, 2012
An Apology
Sorry for not posting in a while. We've had finals and projects due and it's been a stressful end of the school year, but we're now on summer vacation so expect to see more new and awesome designs. Don't forget to check Mai Maddie Pedi often for new swatches, ideas, and designs. Happy Summer!
Sunday, May 6, 2012
Floral!!!


This was my first time experimenting with floral nails. I always admired floral nails when I saw pictures online, but I was always too lazy to try it myself. Then I realized I needed to update our blog so I ended up trying it out.
More Cheetah!


Cheetah nails seem to be getting more and more popular. My auntie always complained that her nails weren't modern enough since I used to just do plain flowers. So this time I spiced it up a little and this is what she got!!!
Opposites Attract


Wednesday, May 2, 2012

Monday, April 23, 2012
Across the Sea Manicure

For this manicure I used 2 coats of China Glaze Atlantis, Zoya Maisie, and Deborah Lippmann Across The Universe.
Thursday, April 19, 2012
Glitter Gradient Mani!

For this manicure, Deborah Lippmann's It's Raining Men was used for the red tips, and a combo of Deborah Lippman's Happy Birthday and Opi's Rainbow Connection were used for the gradient effect.
Monday, April 16, 2012
Salon Glitter Calgel: Mickey Mouse Nail Manicure!

Friday, April 13, 2012
Incoco Nail Strips

This is my first time trying nail strips and I did not have a very good experience with them.
Thursday, April 12, 2012
Cheetah Nails!


Salon Glitter Pedi and Calgel Mani!
From my earlier posts, it's quite obvious that I'm in love with Salon Glitter. Well, guess what?! My cousin visited my favorite salon yet and came out with sparkly fingernails and cute tosies!!! Isn't it adorable? Her calgel manicure has glittered tips with rhinestone detailing, and a cute little bow on the ring finger. Her toes are painted a nice royal blue with pastel flower detailing, perfect for spring! :)


If you get the chance, check out Salon Glitter. You'll definitely be satisfied <3


If you get the chance, check out Salon Glitter. You'll definitely be satisfied <3
Sunday, April 8, 2012
Happy Easter!
Here is my spring look-alike as I promised! Please be sure to check out one of our favorite nail blogs!
MY AWESOME BEAUTY
Sophie is the author to this "colorful and lively" blog. She writes reviews and always comes up with artsy, creative, and super awesome geometric nail designs. Plus, she holds competitions and gives away prizes!! So be sure to check it out!
Happy Easter!!


MY AWESOME BEAUTY
Sophie is the author to this "colorful and lively" blog. She writes reviews and always comes up with artsy, creative, and super awesome geometric nail designs. Plus, she holds competitions and gives away prizes!! So be sure to check it out!
Happy Easter!!


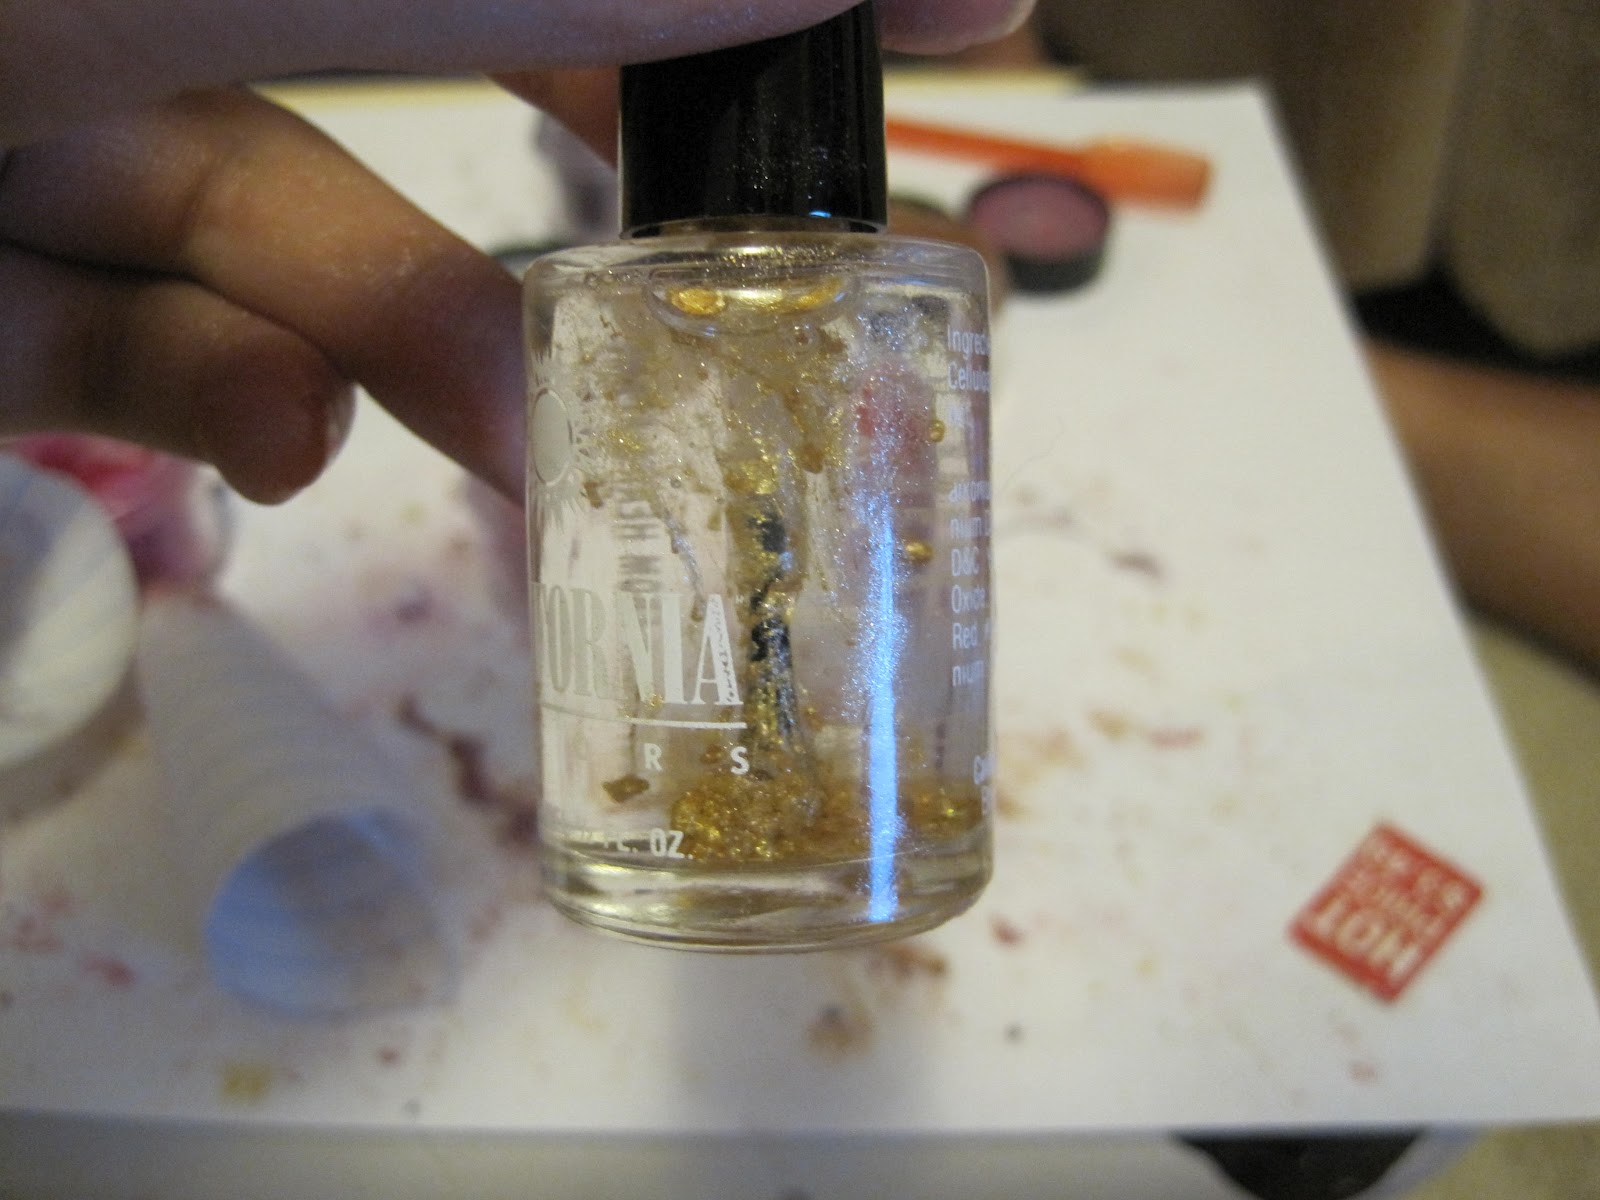
Want to Learn How to Make Your Own Nail Polish?
A few months ago, I did a project where I learned how to make my own nail polish and then went to a Senior Citizen group in Manoa and treated the women to complimentary manicures! It was so much fun making the polishes, painting nails, and creating designs, making each woman feel special and beautiful. Maddie helped me paint their nails and it was priceless seeing the smiles on their faces and hearing their stories, and I hope I can do again in the future. Through the process, I learned how simple it is to create your own nail polish colors.
1. Buy clear nail polish
2. Buy loose eye shadow pigments
3. Mix the eye shadow and clear nail polish and you get your own original colors!
Here are some pictures of some of the process. Please let us know if you have any questions. If you decide to make your own colors, send us your pics to maimaddiepedi@gmail.com so we can show of your polishes!


Just a Little Thanks
Thank you guys so much for viewing our blog! We have views from all over the world :) Don't forget to spread the word!! Also, feel free to follow us! Thank you!!!!
<3always,
Maddie&Maia
<3always,
Maddie&Maia
Saturday, April 7, 2012
China Glaze Tinsel Town & OPI Gone Gonzo!


My Glitter Gradient Attempt

Friday, March 23, 2012
Bows!!!
After spending the week in Waikiki, I got into the Asian spirit! Nah, just joking. I actually did this pedicure before my vacation, but the bows fell off during my volleyball practice D: It was probably because I did a lousy job applying these cute 3D bows (ordered online from eBay) as I just stuck them on my nail after applying a top coat. Luckily, I was able to save the bows and I was able to reapply them using nail glue. I just love these cute little 3D accessories for the nails!
Oh by the way, for the base color, I just added a layer OPI's Rainbow Connection (from the Muppets collection) on top of black polish. Super simple!


Oh by the way, for the base color, I just added a layer OPI's Rainbow Connection (from the Muppets collection) on top of black polish. Super simple!

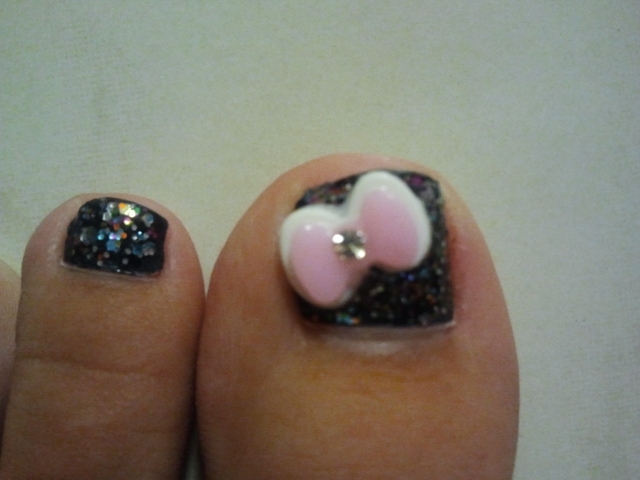
Do my feet look a little more tan after spending time in the sand? :p
Sunday, March 18, 2012
Happy Belated Girls' Day!
I did this for my mom last week Friday, but I haven't had the chance to upload it. I actually tried to make a sakura (cherry blossom) since Girls' Day was earlier this month. However, it didn't really turn out like a cherry blossom; it was more like a four-leaf clover. That's how I got my St. Patrick's Day clover! Sorry for the blurry pic!


Cupcake Manicure!
I saw a picture on the internet once, and I saved it, hoping I'd be able to try it out one day! Well I finally got the chance. Unfortunately, it came out a little more sloppy than I hoped, but it was my first try doing this kind of nail art. Can you tell which one is mine? (haha, obviously the more sloppy one)

Mine is a little different because I didn't have star jewels and I didn't put stripes on the bottom of the cupcake. Also, the colors are a little different.
Keep checking back to see my next look-alike pedi, perfect for spring!


Keep checking back to see my next look-alike pedi, perfect for spring!
Salon Glitter Calgel
Do you remember my blue and pink Hello Kitty calgel nails from Salon Glitter? Well, here is a picture of my Mom's manicure. I loved it because it was nice and subtle, but at the same time, super cute with the gold bow decal. Isn't it adorable? Like mine, her manicure lasted FOREVER (over 5 weeks), but she wanted to get another calgel manicure since she had an interview. Here's her story:
 After about 5 weeks, she called Salon Glitter to see if they had an appointment for that day. Unfortunately, they were too busy that day, but she really needed a new manicure for her interview the next day. Then she remembered that she always wanted to try Don Quijote's nail salon since it's always super busy when we go grocery shopping there. She wanted a quick appointment, but little did she know she was in for a couple hour visit. First of all, it was a nightmare getting off Salon Glitter's gel, plus there was a extra fine for removing it. After patiently waiting for the gel to come off (not even completely), the lady asked her what color she wanted. My mom chose a silver glitter, which eventually turned gold after a few days (it was actually pretty cool). But here's the thing, the lady didn't file her nails evenly (some nails were crooked, and none were the same length) and the final product wasn't even smooth! (it was bumpy). The price is another story. Total, the final price of my Mom's manicure was about the same as Salon Glitter, if not a little more (about $30 just for removing the gel...ridiculous if you ask me). I'm sure if Don Quijote's salon was the first salon we visited, we would've been satisfied. However, after visiting Salon Glitter and experiencing their intricate detailing and quality, Don Quijote's salon didn't fulfill our expectations. I don't know, maybe we just had a bad first experience at Don Quijote. Oh and sorry, I don't have any pictures :(
Let us know about your salon visits!

Let us know about your salon visits!
Saturday, March 17, 2012
We're Now On Tumblr!
We've had some requests to make a Tumblr, and we finally have!
maimaddiepedi.tumblr.com
Oh and don't forget to email us with any feedback, questions, comments, or requests. We'd love to hear from you all!
maimaddiepedi.tumblr.com
Oh and don't forget to email us with any feedback, questions, comments, or requests. We'd love to hear from you all!
Friday, March 16, 2012
Happy St. Patrick's Day!


Kiss me, I'm Irish ;)
We're Back!!!
We apologize for not updating our blog in a while! It's now SPRING BREAK so expect a few extra posts!
<3, Maddie and Maia
<3, Maddie and Maia
Monday, February 20, 2012
Deborah Lippmann Good Girl Gone Bad & Flash Dance

I've kind of been on a Deborah Lippmann kick recently and have been wearing a lot of her polishes.
Tuesday, February 14, 2012
Roses and Hearts and Diamonds, Be Mine!


Subscribe to:
Comments (Atom)